Tutorial - Bloom Effects (using 3.4 right now)
This is based on original XNA version (which used DrawComponent) however we'll make some slight modifications. I personally don't recommend using DrawComponent so we'll just make it a regular class. Also we just make a few slight adjustments to the shaders since shaders are at this time a tiny bit different (just parameters). What we'll make:
Step 1) Start a new MonoGame project. I will call this one BloomTest. (or add to an existing one)
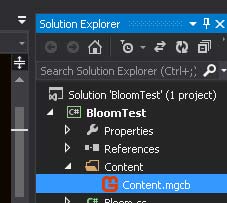
First we'll add a SpriteFont to the content pipeline. If using MonoGame, you'll double click on the following(highlighted) to open the MonoGame content pipeline:
Then add a SpriteFont to the Pipeline. I'm calling it hudFont like in the xna example. To do this click edit, add item, and SpriteFont. You can also right-click an item and go to location - then right-click and edit with notepad++ or something to edit the font. (it's possible to use font textures too - need to edit the processing)
Step 2) Add the following variables at the top of your Game1 class:
(debugging so FullScreen false for now), presentation parameters - hold info about how graphics display (like size /color format for example)... I guess most of these vars are easy to understand - so I'll just explain a few. Bloom is going to be a class that we will add that will hold our bloom stuff (except we won't do it as a drawComponent like in xna example). The lkb for example holds the previous keyboard state (to check for single keypress).
BloomSatPulse, bloomSatDir -- pulse amount and direction of pulse change
We'll add a Lazer class also which will store information about each lazer shot. The rectangles are the sourceRects for the lazer spritesheet (where to copy from).
lazer1_orig, glow_orig -- hold the center of rotation points inside each sourceRect. Important to understand that the origin is not relative to the spritesheet - it's actually relative to the sourceRect. So if the sourceRect was (40,40 - 100,80) and we wanted a center rotation for that we would use and origin of (100-40)/2, (80-40)/2 so origin = (30,20)
(Note: Remember - if you find some things underlined (ie: Song) you can often right-click on it and click resolve and it will show you the using option which if you click it will automatically include the using namespace at the top)
Step 3) Add the following Init code. I should note that you need to wait until after the contructor to attain the presentation parameters (or they may not be correct). If you tried to assign your graphics card to a display resolution it is not compatible with it will use the closest matching display. That is why it is good to extract the current presentation parameters after setting it up and store in screenW, screenH and screenRect (which will come in handy for matching backgrounds to display size).
Here we create our bloom object (we'll make the class later), and 2 render targets which match our backbuffer(swap chain)display format. For some effects that do not require precision you can use half or even quarter resolution to save video ram and blend them into the scene by stretching them with a destination rectangle.
Step 4) Loading content:
(Note - I'm 99.9% sure the dispose of the render targets is not required as it should do this by itself. The original xna version did this - probably so you had the option to do it if in the program you reach a point where you no longer need them -- rarely when programming c# you may find things that are unmanaged which you need to add dispose methods to and call to prevent memory leaks).
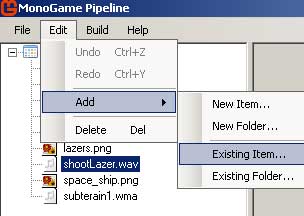
We already added hudFont to the content pipeline. You'll want to make a seamless repeating background and add it to your content folder. You can then go into the MonoGame pipeline, edit, add existing item, and add the background.png image (as link). If it is not in your content folder, you also have the option to add it from another location as a copy (it will copy it into content folder).
So you will also need to add space_ship.png and a lazers.png spritesheet (I'll include these in source code).
bloom.LoadContent has not been implemented yet - we'll add that later.
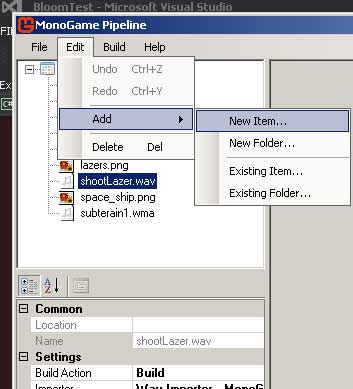
Also you can add shootLazer.wav, subterain1.wma, and others with the pipeline. MediaPlayer controls music (obviously).
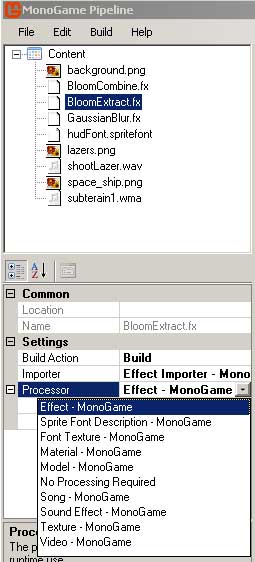
If you look down in MonoGame pipeline when you select an item you can see its settings. You may sometimes want to edit settings like to target a specific platform or change image processing. For example, you may want to use DXT compression to save video (which is good for backgrounds), or change premultiply alpha -- if you are doing a 3D game you would probably want to generate mipmaps for LOD for example.
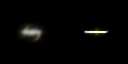
I used these for lazer sheet. I will use additive blending and white for center and red (or whatever color you tell it to draw as) for the lazer glow using this image to extract the 2 sourceRects from:
NOTE: That since I don't want to split up bloom layer drawing twice, I cleared the black around the lazers. They have black backgrounds ONLY in this image so you can actually see them (white on transparent):
Step 5) Just before the update, I'm including enum for controllers. You could also add one for keyboard control so whichever the user prefers to use you can switch control types (potentially you could use all).
It's initially set to mouse, but pressing Start button sets it to gamepad control.
It first captures the old controller states from the last loop and captures the current keyboard, mouse, and gamepad states.
If the previous state was not pressed but it is pressed now, then it is considered a button hit. (holding it down doesn't count)
BloomSettings will be added in a bloom settings class later (which I'll explain then) - so just trust the mode change code for now.
With mouse velocity, depending on how far the mouse moved in the frame it might cause too much acceleration so it is clamped within a -20 to +20 range for X and Y speeds. Velocity = 20% of position difference between mouse and ship between each frame. This creates a nice easing effect on the velocity that makes the ship velocity adjust smoothly (thus rotation follows more smoothly).
In gamepad mode, it simply multiplies the amount of direction of the thumbstick by 20 (and flips the Y for the velocity).
Position of ship and background are adjusted based on velocity each frame. The background is drawn with UV linear wrapping as the sampler state so no matter where we place the background, it will be some wrapped value causing it to repeat without having to draw 4 copies of the background at different 4 positions. This is much more efficient and something like this can be done for other layers of parallax.
Direction is copied from velocity. We need to remember velocity still and we want to normalize the direction (a direction vector of length 1 ) -- this way we can multiply a direction by a size to get a vector pointing in the same direction of any size we choose.
The position of the ship is clamped within 40% from the edges of the screen.
If the direction of the ship isn't basically zero, we can normalize the direction, remember the original aim direction and calculate the ship rotation using atan from the direction vector.
if the lazer_timer has reached zero (amount of time before can shoot another lazer), we check for lazer button input. If so then we get a quaternion for z rotation to transform the lazer-gun offsets of the ship based on rotation. We then add a new lazer at the ship position + gun_offset and give it a velocity of ship speed plus 10 in the aiming direction (although you might want to increase this speed higher than 10 so lazers are faster than max ship speed). [ditto for lazer gun 2 except at offset +8 instead of -8]
We then play the lazer noise with some pitch variation. For enemy ships I would also add stereo panning instead of 0.
Lazer timer is set to 5 to space out the time between lazer shots. (lazer counter counts down until ready for another lazer)
For each lazer, it updates the position based on velocity (in Lazer class which we'll add soon).
Any lazers that have expired (too far away or hit something) are removed from the list (and list is reduced in size).
Next is animation of the bloom saturation setting to make the bloom pulsate. bloomSatDir is the up down direction of the pulse and BloomSatPulse simply holds the pulse setting which is passed to bloom.Setting.BloomSaturation in the Bloom class (which we'll get to soon).
Also we have a helper method for random floats which we used with the pitch variation in the sounds (we could use for other things too like fire spreading from thrusters).
Step 6)
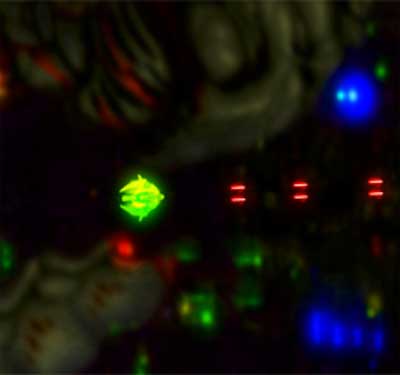
You can set blooming of background to true or false. I wanted to show that bloom and other effects can be applied in layers which is why I don't bloom the background by default (or maybe you want to bloom it with different settings or apply different effects for example).
First we set the first render target - renderTarget1. Which is any elements in the scene that we want to be drawn with this bloom effect applied. So probably ships, lazers, explosions, lights and other effects.
The bloom class (we've yet to make), will then use the renderTarget1 as a source to make a bloomed version in the destination target: renderTarget2, which will be drawn over top of the background items that we do not want bloom effects for.
SetRenderTarget(null) changes rendering to backbuffer which is our regular display (and will be visible when the swap chain/page flips) at the end of the draw call.
So we then draw our wrapped background (by setting the SamplerState to LinearWrap), using opaque (non-see-thru solid) -- layers with transparent pixels would be drawn with nonpremultiplied or alphablend (depending on how the png was made).
Next we draw the bloom layer we already created over top of the scene - stretching it to the screen dimensions(in case it is not already the same).
Finally we call our text drawing method, and then flip the page to present the result(base.Draw).
Step 7) Other Drawing Methods:
Draw ship is simple. It just draws the ship with default settings at it's position, null (to set full image as sourceRect - since it's not a spritesheet), rotation, center of rotation (origin - relative to sourcerect), scale: 1.5
DrawLazers:
Here I use a different Begin style for Additive blending (brightness stacks up and darkness is more transparent) - this is good for lights, lazers, and background fire halos.
All the lazers are drawn with the white center part and additively blending the glow colored red over top (you can try other colors). The text drawing is pretty straight forward (black and white versions with offset so easier to see)
Step 8) Now right click on your project name (ie: BloomTest) and add a class called Bloom.cs
In the constructor of the class, we'll pass in the device to use and the instance of the spriteBatch we already made. (in c++ these would be like pointer versions - which merely keep track of the original in memory).
We'll be using 3 effects:
BloomExtractEffect -- extracts the bright parts
GaussianBlurEffect -- blurs the image (horizontally, vertically or both)
BloomCombineEffect -- creates the final bloom effect
renderTarget1 and renderTarget2 are for creatting intermediate render target stages of the effect (ie: bloom on 1, then gaussian blur it horizontally to 2, then blur again vertical to 1, then combine to 2)
We will also make a BloomSettings class (haven't made yet) which will hold a table of setting types we might want to use
enum IntermediateBuffer -- is for how far into the intermediate buffer stages we want to show. For exampe we might have it only show the first part, prebloom. Or set it to show the next stage: BlurredHorizontally, etc... In your final version you can remove this stuff and just have all the effects active for final result only.
Step 9) Load the effects:
We need access to the content manager so we pass that in and the original presentation params so we get the correct screen dimensions and formats for our rendertargets.
First we load the .fx stuff (we'll add these later)
Next we get the display format and create the 2 rendertargets with half the normal screen size to save video ram and generally be more efficient (since precision isn't so important with this effect - not noticable).
Step 10) Draw the Effects
1 -- Use bloom extract effect, setting the current bloom threshold and draw from our scene source rendertarget into renderTarget1 using the extract effect (preBloom) [the last parameter is temporary for this test program - its just used to decide whether an effect will be shown]
2 -- We set the blur effect parameters to be 1.0f divided up into the number of pixels wide the render target is (later you'll see how that method works) and then draw from target 1 to target 2 with horizontal blurring.
3 -- We then do the same sort of thing for vertical blurring
4 --
set the destination render target and shader parameters based on current settings.
IT IS IMPORTANT to note that normally if parameters don't change - we would certainly not do this in the draw or update - but instead change them only in the initialize or load. It is only necessary to change parameters which change each frame.
IT IS IMPORTANT - to note that your second or third or more textures being set should be passed as a parameter into the shader (at this time). Also it is important that your vertex declaration matches your vertex shader and the vs shader output matches the ps shader input. Since SpriteBatch uses SV_Target0, COLOR0, TEXCOORD0, you must use that (not POSITION0 for example) as inputs to the pixel shader (otherwise they'll be set to wrong register).
Finally we draw renderTarget1 to the destination render target (passed from game1) with the combined effect (which I'll show later)
IT IS IMPORTANT - to clear the render target to clear (or transparent black) so that it doesn't have a black solid background when layering the effect over the scene. We draw with AlphaBlend (not opaque) to use see-through pixels using the passed in size.
Step 12) SetBlurEffectParameters - We retrieve the parameters for the effects, get the number of samples and use to create temporary arrays for computing the filter values with.
Compute gaussian takes the offset amount and uses its formula to compute the weight value for that sample (based on blur amount)
We then compute the sample offsets -delta, delta in each loop pass (more info in comments)
We then normalize the weights(base on total weights) and pass the weights and offsets into the shader.
Step 13) Right click on the project and add class: BloomSettings.cs
This will hold Name, BloomThreshold (brightness for bloom), BlurAmount, BloomIntensity(0-1), BaseIntensity(0-1), BloomSaturation (which we animate for pulsation), and BaseSaturation -- these are explained in comments below.
PresetSettings creates a list of preset settings of all these values using the constructor.
Step 14) In solution explorer, right click the very very topmost thing (ie: Solution 'BloomTest' (1 project)) and right-click add, new item and find shader and call it prototype.hlsl and add the following template code:
Step 14.5) Save As: (go into content folder) "BloomExtract.fx"
Step 15) Change it to match the following:
Change technique to BloomExtract, add BloomThreshold, and change the contents of PixelShaderFunciton. This takes the original pixel(texel) color in c. Then it takes the difference between the color and the threshold value(for each color channel) and divides by the amount of the opposite half of threshold -- saturate clamps the colors to their normal maximum ranges (0f-1f) so that the return color makes sense if it tries to go out of bounds. This has the effect of extracting the brightest parts of the image which will be bloomed.
Step 16) Save this.
Then
save it as "GaussianBlur.fx" and change it to match this:
This goes through precalculated offsets to get samples and multiply them by a weighting percentage for the final color average (to gaussian blur it).
Step 17) Save this.
Now save as: "BloomCombine.fx"
NOTICE: that do to a temporary bug, we need to pass in BaseTexture as a parameter using .SetValue and use the following format for textures (when more than 1 [ie: 2 as below]) (don't set like device.texture[1]... )
And use this for the second texture:
sampler BaseSampler : register(s1)
{
Texture = (BaseTexture);
Filter = Linear; // Linear clamping
AddressU = clamp;
AddressV = clamp;
}
First it looks up the color from the bloom image and also a color from the base at the same pixel location on the other image. Then using an adjust saturation function, we adjust the bloom amount and multiply it by an intensity factor. We use a similar technique for the base.
Then we darken down the base amount to prevent a burned out look and return the combined amounts additively.
Step 18) Right click in solution explorer to add a Lazer.cs class to the project. Add the following code:
The color can be used to store lazer colors (this could be adapted for explosions or sparks). Position, velocity, and scale are all pretty straight forward (may not need scale - unless for some effect).
Rotation rotates the lazer in its direction(velocity vector).
expired is used to signal to remove it from the list (as in game1 update).
The constructor creates a new lazer at position and speed and sets rotation based on velocity vector using atan2. Default collision radius is 8 (may need to adjust update if scaling).
Update modifies the position based velocity but also updates it based on how fast is world moving by. If the lazer is too far off screen - set it as expired. Lazers could also be given a lifetime or set as expired on impacts too.
Step 19) Just as a precaution - check to make sure
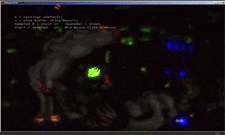
If you build the program it should now run and should look something like this:
Source Code (project build done with VS 2013 but you can create a solution for VS 2010 too)