MonoGame (new XNA) Tutorial:
Platformer Game Programming Tutorial
With Effects and Smooth Animation
(Page1, Page2, Page3, Page 4, Page5)
Page3:
First we'll start with Player animation and controls...
43) First we'll need a head's up display (HUD) so the player can see their player's status.
a) Go into solution explorer and right click on your User Interface folder, Add>>Class: "Hud"
b) We'll store a Texture2D for the HUD graphics so we can add lots of interface elements later if wanted (like fancy looking menu's, inventory display fx, dialog-box frames, etc... )
We'll also need to know the source-rects for the lifebar, lives, etc...
- // H E A D S U P D I S P L A Y (lifebar, lives, score, etc)
- class Hud
- {
- SpriteBatch spriteBatch;
- SpriteFont font;
- Texture2D hud_tex;
- Rectangle lifebar_border, lifebar, life_word, mini_hero, life_rect;
- Vector2 lifebar_pos, lives_pos, life_word_pos, count_pos;
- public float life; // amount of life in lifebar
- public int lives; // number of retries
- spriteBatch, font - refer to instances made in Game1.cs
- hud_tex - a unique texture map containing all the images used for any interface stuff (HUD)
- lifebar_border, lifebar, etc.. - source of the lifebar border image, etc...
(life_word is literally the word "Life:" as a graphic, mini_hero is a tiny image of main character used to indicate number of lives)
c) Constructor: set up all the source rectangles to extract images from the texture map for HUD
Also setup the default positions of your HUD items..
- // CONSTRUCT
- public Hud(SpriteBatch spr, SpriteFont fnt)
- {
- spriteBatch = spr;
- font = fnt;
- lifebar_border = new Rectangle(0, 64, 284, 21);
- lifebar = new Rectangle(0,0,284,21);
- life_word = new Rectangle(0, 22, 60, 27);
- mini_hero = new Rectangle(326, 14, 48, 37);
- life_word_pos = new Vector2(10, 6);
- lifebar_pos = new Vector2(70, 10);
- lives_pos = new Vector2(360, 3);
- count_pos = new Vector2(410, 10);
- }
Obviously if your HUD is different, you need to remember to change the source rects to match. ;p
d) First, you'll need to use the MonoGame pipeline to add the Content: hud.png which may look something like this (the black pixels are actually transparent - just looks black on the dark background):

We'll need to be able to Load the HUD texture and set the default life/lifebar, and lives (retries):
- // L O A D (and INIT)
- public void Load(ContentManager Content)
- {
- hud_tex = Content.Load<Texture2D>("hud");
- life = 1.0f; // ranges 0-1 (like 0% to 100%)
- lives = 2;
- life_rect = lifebar; // source of image changes length depending on life
- }
e) Rather than calling an update(), we'll just access the public values for life and lives. So next we need to draw the HUD:
- // D R A W
- public void Draw()
- {
- spriteBatch.Draw(hud_tex, life_word_pos, life_word, Color.White);
- spriteBatch.Draw(hud_tex, lives_pos, mini_hero, Color.White);
- spriteBatch.DrawString(font, "X "+lives, count_pos, Color.LimeGreen);
- life_rect.Width = (int)((float)lifebar.Width * life); // calculate lifebar's source width based on life
- spriteBatch.Draw(hud_tex, lifebar_pos, life_rect, Color.White);
- spriteBatch.Draw(hud_tex, lifebar_pos, lifebar_border, Color.White);
- }
- draw the word "life:"
- draw the tiny picture of your player where the number of lives are to be displayed
- beside the tiny picture put an "X" plus the number of lives
- set the life-bar's rectangle to be the max_width * life% (0-1)
- show the life bar
- place the lifebar border over the life bar rectangle
to frame it nicely. :)
46) Particle Effects (used with spell casting):
a) In solution explorer right-click on project to Add>>Folder: "ParticleFX"
b) Now right click on ParticleFX folder and Add>>Class: "Particle"
c) A particle will have a position, velocity, rotation, rotation_velocity, scale, color, life(amount) & lifespan
- class Particle
- {
- public Vector2 pos, vel;
- public float rot, scale, rot_vel;
- public Color col;
- public float life, lifespan;
- public Particle()
- {
- col = Color.White; scale = 1.0f;
- }
- }
d) Right click on ParticleFX folder and Add>>Class: "ParticleSystem"
e) For this example, we only have 1 particle effect type (fire), but we'll talk about how we could add more when needed.
Obviously we'll need an array of particles... using a system memory pool with a few tricks we can make this fairly efficient.
- public enum ParticleType { fire, } // later add other particle types
- class ParticleSystem
- {
- Particle[] particles;
- public int capacity, count; // capacity = total amount possible, count = current amount
- Texture2D tex; // texture sheet to extract particle image from
- Rectangle source_rect; // rectangle of image on tex sheet
- Vector2 center; // center of source_rect
- ParticleType particle_type; // fire, etc...
- // REGULAR PARAMS
- // note: emitters that move have an updated speed and location ... the speed changes based on emitter_vel_dampen (set to 1 to ignore this)
- // behaviors can be altered within or preferably outside the particle system class for unique projectile motions/behaviors (like bouncing off walls)
- public Color start_col;
- public Vector2 emit_world_pos; // emitter's world
- public Vector2 emit_vel; // emitter's velocity (if moving)
- public float emit_vel_dampen; // amount to slow down ( 0.1 = slow down now!!!, 0.9999 slow down gradually, 1=never slow down, 0 = stop )
- public int emitter_width, emitter_height; // girth at emitter location
- public Vector2 spray_direction; // adjust this in update if needed
- public float start_scale; // use custom update with multiplier to do non-uniform scale updates
- public float rot_speed;
- public float velocity_range; // max randomization of velocity
- public int min_life, max_life; // shortest and longest life span
- public float gravity, scale_rate; // gravity, scale speed
- public bool spawn; // whether to spawn new particles (if emitter is too slow it dies and stops producing new particles)
- public bool dead; // if particles can no longer spawn and all life for each is too low then this emitter can be declared dead and thus removed
If the particle source slows down to not moving, spawn can be set to false to cause the particle effect to die off.
f) Construct builds a desired particle effect type (we only have fire for now)... let's start by providing the location of the emitter, an emitter velocity (how fast the emitter itself changes location), maximum possible number of particles, the type (fire) and the texture that holds the various particle effect shapes/images...
- // CONSTRUCT
- public ParticleSystem(Vector2 location, Vector2 vel, int max_particles, ParticleType type, Texture2D Tex)
- {
- tex = Tex; spawn = true;
- particles = new Particle[max_particles];
- capacity = particles.Length;
- for (int i = 0; i < capacity; i++) particles[i] = new Particle(); //allocate all particles (will be reused)
- emit_world_pos = location; emit_vel = vel; // set the world position and speed of the emitter
- particle_type = type;
- // COMMON SETTINGS:
- emit_vel_dampen = 1.0f; // default = no slow-down of emitter motion
- rot_speed = 0.2f;
- emitter_width = 0; emitter_height = 0;
- min_life = 20;
- set the emitter's world location and it's velocity ... and it's type (fire)
- set some default settings (which custom switch(type) will alter if needed):
- // CUSTOM SETTINGS:
- switch (particle_type)
- {
- case ParticleType.fire:
- spray_direction = new Vector2(0, -2.12f); // sprays upward a bit
- velocity_range = 1f;
- gravity = 0f; // no gravity on flames
- start_scale = 1.67f; scale_rate = -0.025f; // start size, how fast it changes size (shrinks in this case)
- max_life = 51; // how long particle stays alive
- start_col = new Color(125, 51, 26);
- source_rect = new Rectangle(128, 384, 64, 64); // where image of particle is located
- break;
- }
- center = new Vector2(source_rect.Width / 2, source_rect.Height / 2);
- } // c o n s t r u c t
If you want to make your own custom particle effects, you can setup a method which adjusts the various parameters using user input (with on-screen instructions. ei: "Press Q,D,W,S to change spray direction\n Press Z,X to change scale_rate", etc)... Note if you wanted to you could also add in an end_col as a target and use Color.Lerp to blend between start color and end color. Just some ideas to consider.
Fire:
- spray upward, velocity multiplier = 1, no gravity, start size, how fast to shrink(in this case) or grow, maximum particle life, starting RGB color, set the source rect manually (using Info window to get) for fire particle image
(sort of a moon shape extracted from tiles_image)
g) Reset can be used to restart all particles at emitter (if need) and
Init Particle will setup a new particle:
- // RESET (causes a restart of all particles at the emitter)
- public void reset() {
- for (int p = 0; p < particles.Length; p++) {
- particles[p].life = 0;
- }
- count = 0; spawn = true;
- }
- // INIT PARTICLE
- void InitParticle(int i)
- {
- float r1 = (float)(Game1.rnd.NextDouble() * 2 - 1), r2 = (float)(Game1.rnd.NextDouble() * 2 - 1); //make 2 random numbers between -1 to +1
- Particle p = particles[i];
- p.col = start_col; // starting color (for more control you can use color.lerp and 2 colors [start,end])
- p.pos = emit_world_pos; // where the particle starts
- //if (emiiter_width!=0) p.pos.X += (float)Game1.rnd.Next(emitter_width); // later may want to use emitter_width or height for expanding emitter (ie: width for splash or flame effects)
- p.scale = start_scale * (float)(Game1.rnd.NextDouble()+0.5f); // randomize scale and resize it based on start_scale
- p.vel.X = velocity_range * r1; // scale the initial random velocity based on range
- p.vel.Y = velocity_range * r2;
- p.vel += spray_direction; // add the spray direction into the velocity
- p.rot_vel = rot_speed * r2; // set a random rotation scaled by desired rotation speed
- p.rot = p.rot_vel*10; // give it some initial rotation
- p.life = p.lifespan = Game1.rnd.Next(min_life, max_life); // randomly set life between min and max
- }
- get 2 random numbers (-1 to +1)
- p will represent particles[i]
- set the start color
- set the start position at emitter
(if using later, could set an emitter width that if not zero, will set randomization of position around emitter based on emitter_width... this is good for splash effects or wide flames for example)
- set scale: start_scale randomized a bit
- motion of particle is determined by the 2 random numbers we made and further influenced by the spray direction (or wind factor)
- rotation_velocity = rotation speed randomized (*-1 to *+1)
- start rotation of particle = 10 * random rotation rate (so it sufficiently has rotation variety when it starts)
- life and lifespan are both set randomly between min_life and max_life (life will countdown to zero before resetting the particle to lifespan)
h) Update(bool is_projectile) will determine whether to move the emitter based on is_projectile==true, and will also add new particles if it needs more (and if spawn == true)
- //------------
- // U P D A T E
- //------------
- public void Update(bool is_projectile)
- {
- if (is_projectile) // ie: if a standard projectile
- {
- if (dead) return;
- emit_world_pos += emit_vel;
- emit_vel *= emit_vel_dampen;
- if ((emit_vel.X < 0.2f) && (emit_vel.Y < 0.2f) && (emit_vel.X > -0.2f) && (emit_vel.Y > -0.2f)) spawn = false; // slowed down a lot - stop making particles
- }
- if (count < capacity)
- {
- if (spawn) InitParticle(count); // ADD PARTICLE
- count++;
- }
IF a projectile (or moving emitter) ...
- do nothing if emitter died and return
-
move the emitter at it's velocity
-
slow down the velocity (depending on dampening value[1 = never slow down, 0.1 = slow down abruptly] )
-
if the emitter has almost stopped moving... spawn is false so it can start fading out remaining particles (after which it is dead)
IF need more particles
- Make more if allowed to...
i) Next we'll loop through all the particles and update their values... and determine if the particles ran out of life or not:
- Particle p;
- int i = 0 , c = 0;
- while (i < count)
- {
- p = particles[i];
- p.life--;
- if (p.life <= 0) // reset this particle
- {
- if (spawn) InitParticle(i); else if (p.col.A > 8) p.col.A-=8; // make new if allowed to spawn else fade it out
- i++; c++; continue;
- }
- p.vel.Y += gravity;
- p.pos += p.vel;
- p.rot += p.rot_vel;
- p.scale += scale_rate;
- switch (particle_type) // custom particle behaviors:
- {
- case ParticleType.fire:
- if (p.col.G > 2) p.col.G--; if (p.col.B > 2) p.col.B--; if (p.col.A > 2) p.col.A--;
- if (p.scale < 0.02f) p.scale = 0.02f;
- break;
- }
- i++;
- }
- if (c >= count) dead = true;
- }
Loop:
- p represents particles[i]
- reduce life
-
if life too low:
--- create a new particle(if allowed - otherwise fade the alpha)
--- count the particles who's life ran out
- apply gravity to particle
- move it, rotate it, scale it
Switch(particle type) { // CUSTOMIZED PARTICLE BEHAVIORS:
- Fire:
--- darken and fade the color (turn to smoke)
--- don't let the scale invert (clamp to 0.02 in this case)
IF counted all the particles to have ran out of life, set the entire effect instance as dead.
j) Drawing the particles is made available for both SpriteBatch technique or QuadBatch (if using):
- //--------
- // D R A W (spriteBatch version)
- //--------
- public void Draw(Vector2 offset, SpriteBatch spriteBatch) {
- for (int i = 0; i < count; i++) {
- var p = particles[i];
- Vector2 poz = Conv.world_to_screen(p.pos);
- spriteBatch.Draw(tex, p.pos + offset, source_rect, p.col, p.rot, center, p.scale, SpriteEffects.None, 0f);
- }
- } // d r a w
- //--------
- // D R A W (quadBatch version)
- //--------
- public void Draw(Vector2 offset, QuadBatch quadBatch) {
- for (int i = 0; i < count; i++) {
- var p = particles[i];
- Vector2 poz = Conv.world_to_screen(p.pos + offset - center * p.scale);
- quadBatch.Draw(source_rect, poz, center, p.scale, p.rot, p.col, SpriteEffects.None);
- }
- } // d r a w
- }
Particles are kept track of in terms of world coordinates, so poz will get this converted to screen coordinates (target display).
- draw each particle at it's position (plus optional offset), using the effect's source rect and current particle values
This works the same way with the quadBatch version, except it's already set a sprite sheet to extract from and it rotates about the origin without messing up the position so to work like the spriteBatch version, it needs to -center*p.scale... (could make a Draw routine to work exactly the same as spriteBatch too if you want)
45) In solution explorer, right-click on c# project_name and Add>>Folder: "Explosions"
(maybe there will be more than one type of explosion system?)
a) Right-click on Explosions folder and Add>>Class: "Animator" (which will be used just for explosions in this case)
b) This Animator can move a source-rectangle frame across an image made of numerous frames of traditional animation by using a timer that determines update of the frame index (which determines the frame source)
- class Animator
- {
- // ANIMATOR (helper - tracks explosions)
- public int frame_index; // frame number
- public int timer; // time between frames
- public Vector2 pos; // world position
- public Rectangle frame; // frame rectangle position (where on the sprite sheet to get the source rect from)
- public bool done; // animation done
- // CONSTRUCT
- public Animator(Vector2 world_pos)
- {
- pos = world_pos;
- }
- }
- constructor initiates the animation at some world location (unless treated as a screen location) and all other values are 0 or false by default so don't need to worry about those.
- actual animation updates are done in a special way based on what's using the Animator - so we leave the updates alone in here
c) make sure the namespace is [your project name].Explosions. ie: Platformer.Explosions
46) Right-click on Explosions folder and Add>>Class: "ExplodeSys"
a) Make sure to add this line to the top:
using [your project name].Explosions;
ie: using Platformer.Explosions;
(or you can use resolve when the time comes)
- // E X P L O D E S Y S (CREATE AND RUN EXPLOSIONS)
- class ExplodeSys
- {
- const int WAIT_TIME = 3; // effects animation speed (ie: 1=fast, 9=slow)
- SpriteBatch spr; // reference to spriteBatch in Game1
- Rectangle start_frame; // first frame of the animated explosion
- Vector2 origin; // rotate and scale around origin
- int width, height; // rectangle size
- int num_frames;
- Texture2D tex; // sheet containing explosion images
- List<Animator> animators; // running explosion animations
- WAIT_TIME is a delay value between frame changes in the explosion
- start_frame is the first source_rect on the left side of the animation strip
- origin - center of explosion
-
num_frames - how many frames of animation
- animators - a list of currently running animations (like for all the different fireball spells)
b) Construct makes a new list of animators, and Load either loads a texture (or passes in a ref to one), and sets the starting rectangle.
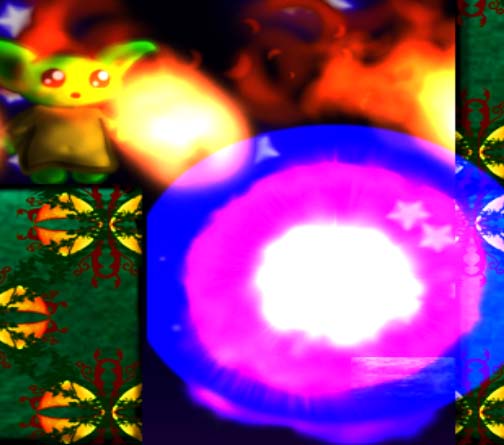
First you'll need an explosion texture and save it into your Content folder. Now add it with the MonoGame pipeline. You could use something like this (smaller version of real one included with source code):
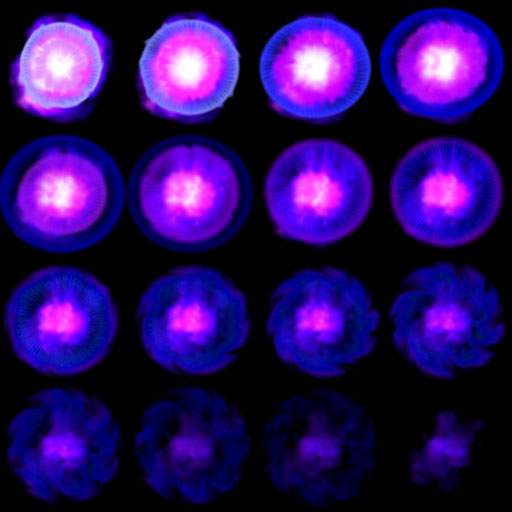 <----SMALLER VERSION FOR WEB
- // CONSTRUCT
- public ExplodeSys(SpriteBatch sbatch)
- {
- spr = sbatch;
- animators = new List<Animator>();
- }
- // L O A D (either load here... or pass in a texture that contains the explosion)
- public void Load(ContentManager Content, int frame_total) {
- tex = Content.Load<Texture2D>("explosion1");
- start_frame = new Rectangle(0, 0, 256, 256); width = height = 256;
- num_frames = frame_total;
- origin = new Vector2(127, 127);
- }
- public void Load(Texture2D Tex, Rectangle first_rectangle, int frame_total) {
- tex = Tex;
- start_frame = first_rectangle;
- width = start_frame.Width; height = start_frame.Height;
- num_frames = frame_total;
- origin = new Vector2(start_frame.Width/2, start_frame.Height/2);
- }
- load explosion image
- set the top-left frame and the frame-advancement width and heght
- set the origin to the middle
c) Add explosion at some location:
- // A D D E X P L O S I O N
- public void Add_Explosion(Vector2 world_position)
- {
- Animator anim = new Animator(world_position);
- anim.frame = start_frame;
- animators.Add(anim);
- }
- creates a new animator at the world position of the explosion
- set the animator's initial frame (starting rectangle)
- add the animator to the animators list
d) We'll also want to update our animation explosions using the animators:
- // U P D A T E
- public void Update()
- {
- int i = 0;
- while (i < animators.Count) {
- Animator a = animators[i];
- a.timer++;
- if (a.timer > WAIT_TIME) { // time to change frames
- a.timer = 0;
- a.frame_index++;
- a.frame.X += width;
- if (a.frame_index >= num_frames)
- {
- a.frame_index = 0; a.timer = 0;
- a.frame = start_frame;
- a.done = true;
- }
- else if (a.frame.X >= (tex.Width - 1)) { // next row
- a.frame.X = 0;
- a.frame.Y += height;
- }
- }
- i++;
- }
- animators = animators.Where(x => !x.done).ToList(); // remove finished animations
- } // update
Loop (all animators):
- update animation timer
- IF waited long enough:
-- reset timer
-- advance frame and move the animator's frame rectangle location by the advancement width
-- IF done all frames
---- reset index, reset timer, reset frame-rectangle, mark as animation as done
-- ELSE
---- IF frame rectangle.X exceeds texture width:
-------- reset rectangle's X and move its Y by the advancement height
After loop:
- remake the list out of animations that are NOT done
Note: You could instead store multiple explosions on a single texture map (1 horizontal strip that ends before texture width for each)
e) Now to draw the explosions, we just loop through the animators and extract images from the source rectangles made during animation updates:
- // D R A W
- public void Draw()
- {
- if (animators.Count <= 0) return;
- int i = 0;
- while (i < animators.Count)
- {
- Animator a = animators[i];
- Rectangle rect = new Rectangle(a.frame.X, a.frame.Y, width, height);
- Vector2 pos = Conv.world_to_screen(a.pos);
- spr.Draw(tex, pos, rect, Color.White, 0f, origin, 1f, SpriteEffects.None, 0f);
- i++;
- }
- }// draw
- }
- a represents animator[i]
- get the rectangle for the current frame
- find the explosion position in screen space
- draw that frame at that position...
47) In solution-explorer, right-click on the c# projection_name and Add>Class: "Sound"
a) Many of the sounds may be re-used in multiple classes... for convenience, we'll store them and load them all in one place... any sound related functions will be kept here. We'll set these as static for easy access anywhere we need them. Other sounds that aren't shared will be placed in their appropriate classes.
- class Sound
- {
- public static Song music;
- public static SoundEffect bounce;
- public static SoundEffect jump;
- public static SoundEffect land;
- public static SoundEffect ouch;
- public static SoundEffect attack;
- public static SoundEffect explode;
- public static float max_pan_distance; // maximum distance for stereo panning
- public static float max_vol_distance; // maximum distance for volume adjustment (based on vertical distance)
b) We'll need to make (record/edit using Audacity or any other favorite audio editor) sounds and put them in a Content/Sound folder:
Attack.wav,
Bounce.wav,
CatOuch.wav (enemy1 damaged), ChainsawHit.wav (enemy1 attack),
Explode.wav,
Jump.wav,
Land.wav,
MonsterHit.wav (enemy2 attack), MonsterOuch.wav (enemy2
damaged)
Ouch.wav
We'll also want some background music. For a slightly more retro sound, I
would recommend Sclub (Blue Moon Sound Club) or you could use something like Ardour - you can export the final version to wav and then edit it with something like Audacity for final export to mp3 (or ogg)
There are also some very good DAW's (Digital Audio Workstation) that are fairly well priced(or basic free versions) and allow VST instruments and huge sampling libraries. FL Studio, Presonus Studio One, and many others are very good. If you're new to music production, you'll first want to learn about compatible chords and figure out what note combinations sound good together(there's music theory based tools built into Studio One). There are lots of tutorials on how to start different styles of music on YouTube by many masters (ie: SeamlessR, Craftmaster Productions, etc).
So you'll then need to add your Music1.mp3 to a Music folder in the Content folder.
c) Add a Load method to load common sounds and default music.
- // L O A D (first)
- public static void Load(ContentManager content)
- {
- max_pan_distance = Game1.screenW * 2 - Game1.screen_center.X;
- max_vol_distance = Game1.screenH * 2 - Game1.screen_center.Y;
- bounce = content.Load<SoundEffect>("Sound/Bounce");
- jump = content.Load<SoundEffect>("Sound/Jump");
- land = content.Load<SoundEffect>("Sound/Land");
- ouch = content.Load<SoundEffect>("Sound/Ouch");
- attack = content.Load<SoundEffect>("Sound/Attack");
- explode = content.Load<SoundEffect>("Sound/Explode");
- // later could set up a LoadSoundsForLevel(int lev) for new levels
- music = content.Load<Song>("Music/Music1");
- MediaPlayer.IsRepeating = true;
- MediaPlayer.Volume = 0.5f;
- }
In this case we used 1.5 * the target-display's width.
- max_vol_distance -- same idea as with pan ... the volume will fade out (for both speakers) depending on how far up or down something is from the middle of the screen.
- load sounds
- load music
- MediaPlayer controls how music is played, volume, repeat, etc... We're using half volume and let the music loop.
d) We'll need a convenient way to get the stereo panning based on where something is:
- // G E T P A N
- public static Vector2 GetPan(Vector2 screen_pos) {
- Vector2 pan;
- float dist = screen_pos.X - Game1.screen_center.X;
- if (dist > Sound.max_pan_distance) dist = Sound.max_pan_distance;
- if (dist < -Sound.max_pan_distance) dist = -Sound.max_pan_distance;
- pan.X = dist / Sound.max_pan_distance;
- if (pan.X > 0) pan.X = 1f - pan.X; else if (pan.X < 0) pan.X = -1f - pan.X;
- dist = screen_pos.Y - Game1.screen_center.Y;
- if (dist > Sound.max_vol_distance) dist = Sound.max_vol_distance;
- if (dist < -Sound.max_vol_distance) dist = -Sound.max_vol_distance;
- pan.Y = dist / Sound.max_vol_distance;
- if (pan.Y > 0) pan.Y = 1f - pan.Y; else if (pan.Y < 0) pan.Y = -1f - pan.Y;
- if (pan.Y < 0) pan.Y = -pan.Y;
- return pan;
- }
- }
- find distance from screen center
- Clamp the distance between -max_pan_distance and +max_pan_distance (you could use MathHelper.Clamp too)
- Find the horizontal (stereo pan) value (ranges -1.0 to +1.0) by dividing by the max_pan_distance
- For Y distance based volume control it only adjusts the overall volume (because we don't have an up and down speaker ;p )
So it basically does the same thing but needs to adjust it to be values ranging (0-1) only (thus the conditional inversions)
48) Right-click on your c# project_name and Add>>Class: "Player"
a) We'll want to enumerate some player states to use to determine how the character should transition in animations and what the player can do (ie: can't jump off of air ... unless that's a feature)
- class Player
- {
- enum motion { none, walk, jump, idle1, idle2, duck, spell, ouch, } // HERO PLAYER STATES
- enum duck_state { down, up }
- enum jump_state { start, air, end }
- enum Facing { left = -1, right = 1 }
Motions are animations. The other states are mainly for control determination.
duck: ducking down or standing up
jump: start = preparing to jump, air = off the ground, end = landing on ground
Facing: is the character supposed to be facing left or right (can't always just use velocity to determine this)
b) We'll need some member variables that actually store the status and states of the player:
- // STATES
- Hud hud; // reference to Game1.hud for display of player status
- Facing direction = Facing.right; // which direction is the character facing <-- -->
- motion hero_motion = motion.idle1, last_hero_motion = motion.none;
- duck_state duck_mode = duck_state.down;
- jump_state jump_mode = jump_state.start;
- // CONSTANTS
- const int half_player_width = 32, player_feet_offset = 26, player_head_offset = 51;
- const float GRAVITY = 0.25f, MAX_FALL_SPEED = 20; // using same in monster class
- const float MAX_VELOCITY = 7.3f; // max walk/run speed
- heads up display
- which direction the character should be facing
- which animation, (last animation)
- squat or stand
- which mode of jump we're in (starting, in the air, landing on ground)
Note: In video tutorial I change player_head_offset = 51 to 71... this is because otherwise the top of the head is too far into tiles and so the player will get stuck horizontally for a moment. 71 is far enough down to prevent this.
Constants will depend on dimensions of your hero (player-character)... If you have multiple different hero's you may want to code it to determine these or simply use a switch to change them (in which case they should not be constants).
The offsets are from the center of the character (player's root or origin) to the top or bottom of the character.
Gravity and Maximum fall speed should be about the same in every creature class (unless it's something that falls slowly - like a chicken with an umbrella) ... depending on what your game does you may also not want to use constants for this.. same goes for Maximum velocity (full running speed).
c) We'll need to refer to the quadBatch (to draw player with distortables), the game map, the map's tiles (easier access), and the bounce manager (controls spring platform animations)
- // DISPLAY
- QuadBatch quadBatch;
- // MAP
- Map mp; // allow access to map instance
- Tile[,] tiles; // reference to tiles[,] from Game1
- BounceMgr bounceMgr; // refer to Map's bounceMgr (for spring platforms)
d) We'll also need some control, position, and status items:
- // COORDINATES AND CONTROL STATUS:
- Input inp; // reference to the input object in Game1
- Vector2 rescale; // refers to Game1's character rescale
- public Vector2 pos; // player's position in world coordinates
- public Vector2 screen_pos; // player's position as it appears on the screen
- public Vector4 bbox; // bounding box used in other modules to determine special collisions (like monsters)
- Vector2 old_pos; // previous world position
- Point old_loc; // previous map location (in tiles)
- Vector2 vel; // player's velocity
- public Point loc; // player tile-map location
- float MAX_JUMP = -14f; // maximum jump-up speed
- bool grounded; // player on ground or not
- public int invincible = 0; // if > 0 invincible = true (counts down to 0)
- public int spell_power = 1; // attack power of spell (damage amount)
Note: the difference between grounded and the jump_state.air is that .air is saying you actually jumped where grounded just determines whether or not your feet are touching the ground... you could have walked off a ledge without jumping (or be climbing something you can't jump off of)
You may notice that I often don't sort private and public members, but prefer to group based on what things are and do and only make them public if I think I'll need to access them elsewhere... (in some cases where changing a variable can affect other things, I'd use private and Get,Set to add other property changes)
e) Some animation controlling stuff:
- // FOR MEOMOTION ANIMATION
- MeoMotion meo; // reference to the MeoMotion class made in Game1
- MeoPlayer meo_hero; // controls player's animations
- bool flip = false; // flip character horizontally ?
- bool must_finish_animation; // if you want an animation to finish completely before allowing switch to the new one
- int idle_timer; // determines when to change idle1 to idle2
- int walk_index, ouch_index; // index of walk and ouch animation (for convenience)
There are some times when you want to make sure an animation has finished before cutting to any other animation (or allowing certain character activities): ie (you just got hurt)
f) Some spell / fx stuff:
- // SPELLS/FX
- public List<ParticleSystem> spells; // magic spells (ie: fire balls)
- Texture2D tex; // Ref to Texture holding spell images (I used tiles_image in Game1)
- ExplodeSys explode; // Ref to explodeSys in Game1 (explosion animations)
List of spells, refers to image that holds them (tiles_image), explosion manager that runs and shows all explosions
g) Player class will need access to some things, so we'll set that up in the constructor:
- // C O N S T R U C T
- public Player(Vector2 world_pos, QuadBatch Qbatch, Map map, Input Inp, Hud hd, ExplodeSys ex)
- {
- pos = world_pos; // set some starting position in the world
- quadBatch = Qbatch; // refer to Game1 instance of quadBatch
- mp = map; // refer to instance of map
- tiles = map.tiles; // refer to map's tiles
- bounceMgr = map.bounceMgr; // refer to map's bounceMgr
- inp = Inp; // refer to Game1's Input instance
- hud = hd; // refer to Game1's hud (player status)
- explode = ex; // refer to Game1's explodeSys (explode animations)
- }
(note that explode, hud, etc... are shared by more than 1 class)
h) Load will load the player's MeoMotion animations and setup a MeoPlayer for it... it will then customize some of those animations. It will also setup particle effects for fire spells (which it can now do because the image is loaded in Game1)
- //--------
- // L O A D
- //--------
- public void Load(MeoMotion Meo, Texture2D Tex)
- {
- meo = Meo; // reference the Game1 instance of the MeoMotion class
- tex = Tex; // reference the Game1 tiles_image where spell images are also stored
- // P R E P A R E C H A R A C T E R
- rescale = Game1.rescale; // copy from Game1 - for character size and adjusted velocity
- meo.Load_TXT("Wizzy", rescale); // load characters/animations (.TXT must be with exe file [ie: BIN - Windows - debug/release] )
- meo_hero = new MeoPlayer("Wizzy", pos, meo, quadBatch); // sets the character to use from the sheet
- // CUSTOMIZE CHARACTER PROPERTIES
- int index;
- index = meo_hero.GetIndex("duck"); meo.anim[index].speed = 5.0f; // speed up ducking animation
- index = meo_hero.GetIndex("jump"); meo.anim[index].speed = 0.7f; // slow down initial jumping animation
- index = meo_hero.GetIndex("spell"); meo.anim[index].speed = 2.5f; // speed up spell/attack animation
- ouch_index = meo_hero.GetIndex("ouch");
- meo.anim[ouch_index].looping = false; // ensure it doesn't loop (if forgot to set in MeoMotion)
- meo.anim[ouch_index].num_keys--; // shorten the animation [don't need last key for this one]
- walk_index = meo_hero.GetIndex("walk");
- meo.anim[walk_index].offset.Y = -6f; // move it a bit so animation lines up better with ground
- meo.anim[walk_index].speed = 0.2f; // speed of walk changes so remember the walk index
- meo_hero.SetAnimation("idle1", flip); // set a starting animation
- // PREPARE SPELLS
- spells = new List<ParticleSystem>();
- spell_power = 1;
- }
- get references to the MeoMotion and tiles_image (containing sprites for particle effects and such)
- load a resolution corrected character (Wizzy txt in this case)
- set the MeoPlayer, meo_hero as "Wizzy"(first and only character on this file),
at any position (for now)
- greatly speed up "duck" animation
-
slow down "jump"
- speed up "spell"
-
remember "ouch" index... make sure it doesn't loop ... remove final key - not using
- remember "walk" index... reposition it up a bit... and slow it down a lot (so can start walking slow and get faster)
- set starting animation as idle1 (facing right)
- create a list of particle systems (spells) for fireballs
- spell damage is 1 for basic spell
i) If the hero jumps or hits a bouncer(in which case it should play a bounce sound), it should start the jump animation (unless we instruct to keep the previous animation)... it should set the jump state to start and grounded becomes false.
- //------------------
- // H E R O J U M P
- //------------------
- void HeroJump(bool play_bounce = false, bool keep_motion = false)
- {
- if ((hero_motion == motion.jump) && (jump_mode == jump_state.start)) return;
- if (!keep_motion) hero_motion = motion.jump;
- jump_mode = jump_state.start;
- grounded = false;
- if (!play_bounce) Sound.jump.Play(); else Sound.bounce.Play();
- if ((must_finish_animation)&&(jump_mode!=jump_state.air)) {
- jump_mode = jump_state.air; vel.Y = MAX_JUMP; // need to trigger from here instead of state because waiting for animation to finish
- }
- }
j) If the hero attacks, we'll set the attack animation and make an attack sound... Spell velocity should be based on direction the character's facing (later this may need to be a switch based on which spell is active assuming we add more spell types)
Attack will also shoot a spell based on spell velocity adding in part of player velocity and have it slow down gradually (ie: 0.99 ... to make it shoot farther you'd use something more like 0.995 for example or for a shorter distance would be like 0.8)
- //----------------------
- // H E R O A T T A C K
- //----------------------
- void HeroAttack()
- {
- if (hero_motion == motion.spell) return;
- if (must_finish_animation) return; // if hurt, animation must finish first
- hero_motion = motion.spell;
- Sound.attack.Play();
- // currently only spell - adjust code for more spells later:
- Vector2 spell_vel = new Vector2(-6, 0);
- if (direction == Facing.right) spell_vel.X = 6;
- // place a new spell (add vel*2 so that the generating spell doesn't lag behind the player as much)
- // also adding to velocity of spell the horizontal motion of hero's vel/2 ... this gives part of forward momentum of player to the spell (fire ball)
- ParticleSystem spell = new ParticleSystem(pos+vel*2, spell_vel+new Vector2(vel.X/2,0), 90, ParticleType.fire, tex);
- spell.emit_vel_dampen = 0.99f; // cause it to slow down a tiny bit as it moves
- spells.Add(spell);
- }
- if already casting this spell or just got hurt, return
-
set the animation as spell and play a sound
-
set the spell in motion (in the correct direction)
- generate the new spell as a particle system slightly in front of character with initial velocity (factoring in some of the player's motion), for up to 90 particles using fire.
- slow the fire ball down each frame ( = 99% of previous frame velocity each frame)
- add this fire ball spell to the list of active particle systems (spells)
k) If the hero is hit, they'll receive damage (if not invincible), and if they loose all their lifebar, they'll lose 1 of their lives and be reset to their world starting point (or a checkpoint if you wanted):
- // H E R O D A M A G E D
- public void HeroDamaged(float life_loss)
- {
- if (invincible > 0) return;
- meo_hero.SetAnimation(ouch_index, flip); must_finish_animation = true;
- hud.life -= life_loss;
- invincible = 100;
- Sound.ouch.Play();
- if (hud.life <= 0.0f)
- {
- explode.Add_Explosion(pos);
- Sound.explode.Play(0.7f,0.7f,0f);
- hud.life = 1.0f; hud.lives--;
- loc.X = mp.startData.x; // reset player position on map
- loc.Y = mp.startData.y;
- pos = Conv.tile_to_world(loc) + new Vector2(-32, -32);
- }
- }
- typically we'll want to set the "ouch" animation to: must_finish
- reduce life bar based on damage
- set invincible count-down to 100
- play ouch sound
IF life bar is empty:
-- add an explosion on the player
-- make explosion sound (I'm using slightly lowered pitch and volume)
-- reset the life bar to full and reduce # of lives
-- reset map location to starting position of player on map
-- set world position of player based on tile location to start at
l) Actually, let's make use of the duck (normally this should change the collision region but you can do that later if you want)...
So for now, we'll just make it so the hero takes half damage when ducking... before the hud.life -= life_loss; let's add this:
if (hero_motion == motion.duck) life_loss /= 2f; // reduced damage if ducking
Ideally we'd make it so there are projectile launchers (like traps or characters that shoot or slash at your head)... in which case the duck motion should change the bounding box for the player and then they would be able to dodge those attacks. It's something that can be added later.
49) Update() for Player.cs:
- //------------
- // U P D A T E (player)
- //------------
- // UPDATE (Handles input and animation updates)
- public void Update()
- {
- old_pos = pos; // previous world position
- old_loc = loc; // previous map location (in tiles)
- meo_hero.play_speed = 1f; // set default speed (if in water or speed boost then it will change)
- MeoAnimation walk_anim = meo.anim[walk_index]; // reference the walk for easier access
- set the default animation speed back to normal
- get a shortcut/reference to the walk_animation for convenience
Next we'll use a switch and based on the current motion state, we'll allow certain types of control responses:
b) So first we'll start with idle:
- // HERO STATES --- PLAYER INPUT:
- switch (hero_motion)
- {
- case motion.idle1: // I D L E ----------------
- case motion.idle2:
- // use timer to select idle mode:
- if ((last_hero_motion != motion.idle1) && (last_hero_motion != motion.idle2)) idle_timer = 0; // not in idle so reset the timer
- if (idle_timer <= 155) hero_motion = motion.idle1; // idle1 for some time
- else if (idle_timer > 155) // idle2 with blink (until it's done)
- {
- if ((hero_motion == motion.idle1) && (meo_hero.IsDoneAnimation())) hero_motion = motion.idle2;
- if ((hero_motion == motion.idle2) && (meo_hero.IsDoneAnimation())) { hero_motion = motion.idle1; idle_timer = 0; }
- }
- idle_timer++;
- if (inp.Keydown(Keys.Right)) { hero_motion = motion.walk; flip = false; vel.X += 0.80f; }
- if (inp.Keydown(Keys.Left)) { hero_motion = motion.walk; flip = true; vel.X -= 0.80f; }
- if (inp.Keydown(Keys.Down)) { hero_motion = motion.duck; duck_mode = duck_state.down; } // check duck last to ensure player's dodging takes precedance
- else if (inp.Keypress(Keys.Up) || inp.Keypress(Keys.Space)) {
- if ((grounded)||(meo_hero.animation_index==ouch_index)) HeroJump(); // allow jump from ground or if fleeing injury
- }
- if ((inp.control_press) || (inp.alt_press)) HeroAttack();
- break;
- idle1 or idle2:
- if wasn't idle last loop, reset the idle_timer (used to determine idle mode switching - like to blink version of idle)
IF idle_timer's less than 155 then its motion should be idle1
ELSE
- IF doing idle1 and the animation has completed a cycle, switch to idle2
- IF doing idle2 and the animation has completed a cycle, switch back to idle1 (reset timer)
- update timer
IF right key, set motion to walk right (no flip) and accelerate in right direction
IF left key, set motion to walk left (flip horizontally) and accelerate in left
direction
IF down key, set motion to duck starting with duck_mode = duck downward
ELSE if up key pressed (or space):
--- if on the ground (or hurt): allow Hero too Jump
[Note: video tutorials will show a slightly improved way of handling jumping [and slight improvement to jump collisions (for head)]
IF control key or alt key then start Hero Attack
c) Ducking modes:
- case motion.duck: // D U C K ----------------- (note: duck logic can be complex)
- switch (duck_mode)
- {
- case duck_state.down: // d u c k i n g d o w n
- meo_hero.reverse = false; // initially ensure forward animation
- if (!inp.Keydown(Keys.Down))
- { // if down released - start standing up:
- duck_mode = duck_state.up;
- if (!meo_hero.reverse) if (meo_hero.IsDoneAnimation()) meo_hero.StartReverse(); // restart animation for reverse if done
- meo_hero.reverse = true; // set this last (for partial duck)
- }
- break;
- case duck_state.up: // s t a n d i n g u p
- meo_hero.reverse = true; // initially ensure reverse animation
- if (inp.Keydown(Keys.Down)) duck_mode = duck_state.down; // start ducking down again
- if (meo_hero.IsDoneAnimation()) { meo_hero.reverse = false; hero_motion = motion.idle1; } // done standing up so go to idle mode initially
- break;
- }
- if ((inp.control_press) || (inp.alt_press)) HeroAttack();
- break;
IF ducking: down
- make sure animation is forward
- IF down key released :
- - set duck mode to up
- - IF was ducking down and animation has finished ... restart animation with a reverse animation for standing up
- - set animation to reverse
IF ducking: up (standing up):
- make sure animation is reverse
- IF key down is pressed: - set duck mode to down
- IF done standing up, reset to forward animation and choose motion for idle1 animation
IF attack button pressed, Hero attacks
e) Walking:
- case motion.walk: // W A L K ---------------------
- hero_motion = motion.idle1; idle_timer = 0; //default to idle if no direction is pressed
- if (inp.Keydown(Keys.Right)) // r i g h t
- {
- hero_motion = motion.walk; flip = false;
- if (vel.X < MAX_VELOCITY) vel.X += 0.80f; // accelerate right
- }
- if (inp.Keydown(Keys.Left)) // l e f t
- {
- hero_motion = motion.walk; flip = true;
- if (vel.X > -MAX_VELOCITY) vel.X -= 0.80f; // accelerate left
- }
- if (inp.Keydown(Keys.Down)) { hero_motion = motion.duck; duck_mode = duck_state.down; } // start duck
- else if (inp.Keypress(Keys.Up) || inp.Keypress(Keys.Space)) {
- if ((grounded)||(meo_hero.animation_index==ouch_index)) HeroJump(); } // start jump (allow if grounded or getting hurt)
- if ((inp.control_press) || (inp.alt_press)) HeroAttack();
- break;
- set idle by default (only continue walk if direction is pushed)
IF pressing right
-- set motion to walk, face right
-- accelerate toward right
IF pressing left
-- set motion to walk, face left
-- accelerate toward left
IF pressing down
-- set motion to duck, and set duck mode to ducking down
ELSE IF pressing Up
-- IF on the ground (or hurt) allow Jump
IF attack button, Hero attacks
f) Jump:
- case motion.jump: // J U M P -------------------
- if (last_hero_motion == motion.jump) // make sure the animation's started already
- {
- if (meo_hero.key1 < 2) meo_hero.play_speed = 4f; else meo_hero.play_speed = 0.5f; // customize play speed to match jumping action
- if ((meo_hero.key1 == 1) && (jump_mode == jump_state.start)) { jump_mode = jump_state.air; vel.Y = MAX_JUMP; } // leaving the ground
- if (inp.Keydown(Keys.Right)) { flip = false; if (vel.X < MAX_VELOCITY) vel.X += 0.80f; } // accelerate right
- if (inp.Keydown(Keys.Left)) { flip = true; if (vel.X > -MAX_VELOCITY) vel.X -= 0.80f; } // accelerate left
- if (meo_hero.IsDoneAnimation()) hero_motion = motion.idle1;
- if ((inp.control_press) || (inp.alt_press)) HeroAttack();
- }
- break;
IF jumping already:
- IF character just starting their jump motion (anticipation), speed up this part of the animation... otherwise SLOW it down
[this is to make the animation match the desired control response better - you may need to tweak your own characters]
- IF second key and jump_mod is start (near end of anticipation): jump_mode = air... and velocity = upward jump speed
- IF right is pressed: face right and accelerate forwards
- IF left is pressed: face left and accelerate backwards
- IF jump animation is done, set to idle animation
- IF attack button, Hero attacks
[ Note: if character is still jump_state.air and animation isn't done and feet touch a platform, this does not allow immediate jumping... so change:
if ((meo_hero.key1 == 1) ... to:
if ((meo_hero.key
>= 1) && (jump_mode==jump_state.start) ...
And this all depends on what keyframe the player jump animation should start leaving the ground, so for you it might not be 1 - could be 2 or 3 depending]
g) Spell (motion set in HeroAttack)
- case motion.spell: // S P E L L -------------------
- if (inp.Keydown(Keys.Right)) {
- flip = false; if (vel.X < MAX_VELOCITY) vel.X += 0.50f; // allow motion right (during attack)
- }
- if (inp.Keydown(Keys.Left)) {
- flip = true; if (vel.X > -MAX_VELOCITY) vel.X -= 0.50f; // allow motion left (during attack)
- }
- if (inp.Keypress(Keys.Up) || inp.Keypress(Keys.Space))
- {
- if ((grounded) || (meo_hero.animation_index == ouch_index)) { jump_mode = jump_state.air; vel.Y = MAX_JUMP; HeroJump(false, true); } // allow jump from ground or if fleeing injury (keep current animation)
- }
- if (meo_hero.IsDoneAnimation()) hero_motion = motion.idle1;
- break;
- }
IF right pressed, face right, accelerate right (slower during attack)
IF left pressed, face left, accelerate left (slower during attack)
IF up jump button
-- IF on the ground (or hurt),
---- set jump velocity(and mode) and trigger Jump (non-bouncer, complete_the_attack_animation_first)
IF attack animation done, set motion as idle
h) Now we'll need to update the actual movement of the character:
- // GRAVITY
- if (vel.Y < MAX_FALL_SPEED) vel.Y += GRAVITY;
- // SLOW DOWN PLAYER:
- if (vel.X > 0) { vel.X -= 0.40f; if (vel.X < 0) vel.X = 0; direction = Facing.right; walk_anim.speed = vel.X * 0.42f; }
- if (vel.X < 0) { vel.X += 0.40f; if (vel.X > 0) vel.X = 0; direction = Facing.left; walk_anim.speed = vel.X * -0.42f; } // animation speeds can only be positive (- x - = +)
- // DETERMINE FLIP
- if (direction == Facing.right) meo_hero.flip = false; else meo_hero.flip = true;
- // MOVE PLAYER
- Vector2 tru_vel = vel * rescale; // factors character resize into velocity
- pos += tru_vel;
- slow down the character ... if a direction is being held then obviously it will negate this effect but as soon as you let go of a button the character quickly slows to a stop. direction is set to ensure the way the character faces will match the previous velocity after the character stops moving. The walking animation speed is also slowed down proportionally (you may need to play with these numbers until you get a match for your own animations).
- Set the flip value based on what direction the character should be facing
- add the true velocity to the player (true velocity is the velocity scaled according to character size adjustment made earlier to match the resolution)
i) Go through all the spells and update them (removing any expired fireball effects)
- // UPDATE SPELLS
- int i = 0;
- while (i < spells.Count)
- {
- spells[i].Update(true);
- if (spells[i].dead) spells.RemoveAt(i); // remove any dead emitters (ie: fizzled out fire balls)
- i++;
- }
- if (invincible > 0) invincible--;
- } // ^^ Update ^^
Loop:
- update a spell (true meaning: as a projectile ... which means it's a moving particle effect)
-
remove dead spells
Also count-down to 0 if invincible (at which point invincibility is finished)
50 ) COLLISION DETECTION (and response)
a) We'll need to add acouple of globals to keep track of whether player is on spikes or was grounded last time
and while we're here, we should get the player's screen position (where to show the player)
Also we'll need a bounding box for determining collisions with other creatures, npc's, players, or objects
And we'll need the player's tile location being occupied and a move vector for determining possible collisions
- //-------------------------------
- // W O R L D C O L L I S I O N S (player vs world)
- //-------------------------------
- bool on_spikes;
- bool last_grounded;
- public void WorldCollisions()
- {
- // GET PLAYER'S SCREEN POSITION
- screen_pos = Conv.world_to_screen(pos);
- // GET CURRENT BBOX COORDS (used in Monster.cs to determine attack collisions)
- bbox = new Vector4(pos.X - 28, pos.Y - 62, pos.X + 28, pos.Y + 16); // (hard-coded for now - so keep this in mind if you alter scale or use another character)
- // get player tile occupation:
- loc.X = (int)pos.X / 64;
- loc.Y = (int)pos.Y / 64;
- int x = loc.X, y = loc.Y;
- // PREVENT ILLEGAL MEMORY ACCESS:
- if ((x + 1 >= Map.TILES_WIDE) || (x - 1 < 0) || (y + 1 >= Map.TILES_HIGH) || (y - 1 < 0)) { pos = old_pos; loc = old_loc; }
- // GET MOVEMENT VECTOR:
- Vector2 move = pos - old_pos;
- // (! Assume velocity never exceeds tile size of 64 which is extremely fast [otherwise you need a sweep test for closest tile interactions] !)
- get bounding box (make sure to adjust this to fit your players - may want to set something up elsewhere so this adjusts correctly)
- get tile player is over (world coordinates / tile_size) ... set x and y as tile location to shorten code a bit
- do not allow character outside the map (set to old position if this happened somehow)
- get the movement vector to determine what tests to do
b) Let's also set a bounce(spring platform) velocity based on MAX_JUMP (which hypothetically could be changed for a super-jump)
float BOUNCE_VEL = MAX_JUMP - 8f; // <-- how fast you'll jump up if you hit a spring platform
c)
If the player's moving up, we should do some tests and reponses to make sure collisions with solid tiles are handled correctly.
- // MOVING UP
- if (move.Y < 0)
- {
- if (tiles[x, y - 1].is_solid) // WILL HIT SOLID (tile above)
- {
- if ((pos.Y - player_head_offset) < y * 64)
- {
- if (tiles[x, y - 1].type == TileType.spring) { vel.Y = BOUNCE_VEL; bounceMgr.Add(x, y - 1); HeroJump(true); }
- else {vel.Y = 0; pos.Y = old_pos.Y;}
- }
- }
- if (tiles[x - 1, y - 1].is_solid) // WILL HIT SOLID (up-left)
- {
- if ((pos.Y - player_head_offset) < y * 64)
- {
- if (tiles[x - 1, y - 1].type == TileType.spring) { vel.Y = BOUNCE_VEL; bounceMgr.Add(x - 1, y - 1); HeroJump(true); }
- else if (pos.X < (x - 1) * 64 + 84) { vel.Y = 0; pos.Y = old_pos.Y; }
- }
- }
- if (tiles[x + 1, y - 1].is_solid) // WILL HIT SOLID (up right)
- {
- if ((pos.Y - player_head_offset) < y * 64)
- {
- if (tiles[x + 1, y - 1].type == TileType.spring) { vel.Y = BOUNCE_VEL; bounceMgr.Add(x + 1, y - 1); HeroJump(true); }
- else if (pos.X > (x + 1) * 64 - 20) { vel.Y = 0; pos.Y = old_pos.Y; }
- }
- }
- if (tiles[x, y].type == TileType.spring) { vel.Y = BOUNCE_VEL; bounceMgr.Add(x, y); HeroJump(true); }
- }
- IF tile above is solid:
- - IF top of head hits bottom of tile:
- - - IF it's a spring..... player flies upwards, Add a bounce animation on the bouncer, Trigger a jump animtion
- - - ELSE you hit your head so prevent the character from going through the tile
- IF tile left-above is solid:
- - IF top of head hits bottom of tile:
- - - IF it's a spring .... player flies up and add a bounce animation and trigger jump animation
- - - ELSE if player is in horizontal range to hit the tile then stop the character from going up (tweak 84 to match your character better)
- IF tile above-right is solid:
- - IF top of head hits bottom of tile:
- - - IF it's a spring.... do what we did before with springs
- - - ELSE if player is in horizontal range to hit it, then stop the player from going up (tweak 20 to better match your character)
- IF IN tile that is a spring, send character flying upward, add a bounce animation, set the jump animation
d) Checking collisions to left and right is a bit more simple:
- // MOVING RIGHT
- if (move.X > 0)
- {
- if (tiles[x + 1, y].is_solid) // WILL HIT SOLID (to right)
- {
- if ((pos.X + half_player_width) > (x + 1) * 64) {
- if (on_spikes) { if (tiles[x + 1, y].type != TileType.spikes) { pos.X = old_pos.X; x = old_loc.X; } }
- else { pos.X = old_pos.X; x = old_loc.X; }
- }
- }
- else if (tiles[x + 1, y - 1].is_solid) // HIT SOLID (up-right)
- {
- if ((vel.Y < -23) || (pos.Y < y * 64 + 40)) // hardcoded as +40 (may need to change for other character sizes)
- if ((pos.X + half_player_width) > (x + 1) * 64) { pos.X = old_pos.X; x = old_loc.X; }
- }
- }
- // MOVING LEFT
- else if (move.X < 0)
- {
- if (tiles[x - 1, y].is_solid) // WILL HIT SOLID (to left)
- {
- if ((pos.X - half_player_width) < x * 64) {
- if (on_spikes) { if (tiles[x - 1, y].type != TileType.spikes) { pos.X = old_pos.X; x = old_loc.X; } }
- else { pos.X = old_pos.X; x = old_loc.X; }
- }
- }
- else if (tiles[x - 1, y - 1].is_solid) // HIT SOLID (up-left)
- {
- if ((vel.Y < -23) || (pos.Y < y * 64 + 40))
- if ((pos.X - half_player_width) < x * 64) { pos.X = old_pos.X; x = old_loc.X; }
- }
- }
- IF there's a solid in the way of your body:
- - IF right side of character hits left side of tile:
- - - IF on spikes and not hitting spikes to the right (regular solid) then stop the character
- - - ELSE just stop the character
- ELSE IF there's a solid in the way of your head:
- - IF moving upward OR position is already 24 pixels from the ground (depends on character):
- - - IF right side of character hits left side of tile... stop horizontal motion
(The reason the character needs to be 24 pixels up is cuz the top of the head wouldn't be high enough to hit something -- this would depend on your character size so you may need to tweak this accordingly)
e) Moving down is the most amount of code because we want very accurate platform detections so you fall off from them correctly. Set on_spikes and grounded as false until determined:
- // MOVING DOWN
- on_spikes = false;
- grounded = false; // reset grounded as false until we know:
- if (move.Y > 0)
- {
- float offy=0; // <--possible offset for collision region (ie: if spikes it is farther down)
- if (tiles[x, y].stand_on) // WILL HIT SOLID (can stand-on)
- {
- if (tiles[x, y].spikes) offy = 28; else offy = 0; // hit spikes 28 pixels down from tile top
- if ((pos.Y + player_feet_offset) > y * 64 + offy)
- {
- pos.Y = y * 64 - player_feet_offset + offy; vel.Y = 0; // set position so on top of tile
- grounded = true; // grounded
- if (offy == 28) on_spikes = true;
- if (tiles[x, y].type == TileType.spring) { vel.Y = BOUNCE_VEL; bounceMgr.Add(x, y); HeroJump(true); } // spring platform
- else if ((hero_motion == motion.jump) && (jump_mode != jump_state.start)) // <-- allows first part of jump motion while grounded
- {
- hero_motion = motion.idle1; jump_mode = jump_state.start; // not starting jump (finishing so reset jump and change animation)
- }
- }
- }
- if (tiles[x, y + 1].stand_on) // WILL HIT SOLID (can stand-on)
- {
- if (tiles[x, y + 1].spikes) offy = 28; else offy = 0; // hit spikes 28 pixels down from tile top
- if ((pos.Y + player_feet_offset) > (y + 1) * 64 + offy)
- {
- pos.Y = (y + 1) * 64 - player_feet_offset + offy; vel.Y = 0; // set position so on top of tile
- grounded = true; // grounded
- if (offy == 28) on_spikes = true;
- if (tiles[x, y + 1].type == TileType.spring) { vel.Y = BOUNCE_VEL; bounceMgr.Add(x, y + 1); HeroJump(true); } // spring plat
- else if ((hero_motion == motion.jump) && (jump_mode != jump_state.start)) // <-- allows first part of jump motion while grounded
- {
- hero_motion = motion.idle1; jump_mode = jump_state.start; // not starting jump (finishing so reset jump and change animation)
- }
- }
- }
- if (tiles[x - 1, y].stand_on) // WILL HIT SOLID (can stand-on)
- {
- if (tiles[x-1, y].spikes) offy = 28; else offy = 0; // hit spikes 28 pixels down from tile top
- if ((pos.Y + player_feet_offset) > y * 64 + offy)
- {
- if (pos.X < (x - 1) * 64 + 84)
- {
- pos.Y = y * 64 - player_feet_offset + offy; vel.Y = 0; // set position so on top of tile
- grounded = true; // grounded
- if (offy == 28) on_spikes = true;
- }
- }
- }
IF can stand on tile (that you're IN):
- IF it's spikes: offset of collision is 28 pixels down
- IF feet hit what's below player:
- - position player just above that thing (cancel Y velocity)
- - set player as grounded (feet touching ground so can jump)
- - if on spikes set on_spikes = true
- - if in a spring, bounce the character upward (setting animations for this)
- - else if jumping but not start of jump already (must be landing): set player to idle and reset jump_state (for next time)
IF can stand on tile BELOW you:
- IF it's spikes: offset collision is 28 pixels down
- IF
feet hit what's below you:
- - position character above it (stopping downward velocity)
- -
set player as grounded and set on_spikes if this is true
- - if on a spring: bounce the player upward (setting the animations too)
- - else if hero is jumping (and not starting a jump) then is landing from a jump so:
- - - set character motion to idle and reset the jump_state (to start for next time player wants to jump)
IF can stand on tile directly LEFT of you (this will push the character up but can't jump while actually in tile):
- IF it's spikes: offset collision is 28 pixels down
- IF
feet hit(or pass) what's there:
- - IF horizontally in range to hit it (+ 84 <-- you may need to adjust this for your character)
- - - position character above it (stopping downward velocity)
- -
- set player as grounded and set on_spikes if this is true
- if (tiles[x - 1, y + 1].stand_on) // down-left (can stand on)
- {
- if (tiles[x - 1, y + 1].spikes) offy = 28; else offy = 0;
- if ((pos.Y + player_feet_offset) > (y + 1) * 64 + offy)
- {
- if (pos.X < (x - 1) * 64 + 84) // allow player to stand at the very edge (hard coded as 84 - change for other character sizes)
- {
- pos.Y = (y + 1) * 64 - player_feet_offset + offy; vel.Y = 0;
- grounded = true;
- if (offy == 28) on_spikes = true;
- if (tiles[x - 1, y + 1].type == TileType.spring) { vel.Y = BOUNCE_VEL; bounceMgr.Add(x - 1, y + 1); HeroJump(true); }
- else if ((jump_mode != jump_state.start) && (hero_motion == motion.jump))
- {
- hero_motion = motion.idle1; jump_mode = jump_state.start;
- }
- }
- }
- }
- if (tiles[x + 1, y + 1].stand_on) // down-right (can stand on)
- {
- if (tiles[x + 1, y + 1].spikes) offy = 28; else offy = 0;
- if ((pos.Y + player_feet_offset) > (y + 1) * 64 + offy)
- {
- if (pos.X > (x + 1) * 64 - 20) // allow player to stand at the very edge
- {
- pos.Y = (y + 1) * 64 - player_feet_offset + offy; vel.Y = 0;
- grounded = true;
- if (offy == 28) on_spikes = true;
- if (tiles[x + 1, y + 1].type == TileType.spring) { vel.Y = BOUNCE_VEL; bounceMgr.Add(x + 1, y + 1); HeroJump(true); }
- else if ((jump_mode != jump_state.start) && (hero_motion == motion.jump))
- {
- hero_motion = motion.idle1; jump_mode = jump_state.start;
- }
- }
- }
- }
- if (tiles[x + 1, y].stand_on) // WILL HIT SOLID (can stand-on)
- {
- if (tiles[x+1, y].spikes) offy = 28; else offy = 0; // hit spikes 28 pixels down from tile top
- if ((pos.Y + player_feet_offset) > y * 64 + offy)
- {
- if (pos.X > (x + 1) * 64 - 20)
- {
- pos.Y = y * 64 - player_feet_offset + offy; vel.Y = 0; // set position so on top of tile
- grounded = true; // grounded
- if (offy == 28) on_spikes = true;
- }
- }
- }
IF can stand on tile below and to left:
- IF spikes, set an offset of 28 pixels down
- IF player's feet hit the top of what's below:
- - IF within horizontal range (84 may need to be adjusted for your player)
- - - position player above so feet are touching
- - - set as grounded (on ground) and on_spikes (if so)
- - - IF it was a spring - launch player into the air and turn on the animations for this
- - - ELSE if player was landing from a jump, set to idle (and reset jump mode for later)
IF can stand on tile below to the right:
- IF spikes, set an offset of 28 pixels down
- IF player's feet hit the top of what's below:
- - IF within horizontal range (20 may need to be adjusted for your player)
- - - position player above so feet are touching
- - - set as grounded (on ground) and on_spikes (if so)
- - - IF it was a spring - launch player into the air and turn on the animations for this
- - - ELSE if player was landing from a jump, set to idle (and reset jump mode for later)
IF can stand on tile directly to the right (this will push the character up but can't jump while actually in tile):
- IF spikes, set an offset of 28 pixels down
- IF player's feet hit(or pass) the top of that tile:
- - IF within horizontal range (20 may need to be adjusted for your player)
- - - position player above so feet are touching
- - - set as grounded (on ground) and on_spikes (if so)
And what should we do if we hit spikes:
- // HIT SPIKES:
- if (on_spikes)
- {
- if (move.Y > 0) {
- vel.Y = -6f;
- HeroDamaged(0.2f);
- }
- }
- if ((on_spikes == false) && (hero_motion != motion.jump) && (grounded) && (!last_grounded)) Sound.land.Play();
- }//^^^ move.Y>0 ^^^
- last_grounded = grounded;
- }// ^^^ World Collisions ^^^ (player vs world)
IF on spikes:
- IF moving down:
- - hop up a bit and take some damage
- IF landing (not onto spikes), play the land sound
Remember if we were on the ground or not in this frame so we don't play the land sound multiple times
51) Set Animation will be called each loop to set any character animation changes that need to be made based on the current motion state:
- //-------------------------
- // S E T A N I M A T I O N ( player )
- //-------------------------
- public void SetAnimation(GameTime gameTime)
- {
- bool allow_switch = true;
- if (must_finish_animation)
- if (!meo_hero.IsDoneAnimation()) allow_switch = false; else { must_finish_animation = false; hero_motion = motion.idle1; }
- if ((allow_switch)&&(last_hero_motion != hero_motion)) // trigger an animation that is NOT already playing
- {
- switch (hero_motion)
- {
- case motion.idle1: meo_hero.SetAnimation("idle1", flip); break;
- case motion.idle2: meo_hero.SetAnimation("idle2", flip); break;
- case motion.walk: meo_hero.SetAnimation("walk", flip); break;
- case motion.duck: meo_hero.SetAnimation("duck", flip); break;
- case motion.jump: meo_hero.SetAnimation("jump", flip); break;
- case motion.ouch: meo_hero.SetAnimation("ouch", flip); break;
- case motion.spell: meo_hero.SetAnimation("spell", flip); break;
- }
- last_hero_motion = hero_motion;
- }
- meo_hero.position = screen_pos; // screen_pos was set in Game1's Update()
- meo_hero.Update(gameTime);
- }
IF the animation has changed since last time:
- IF idle1: tell the MeoPlayer to be playing the "idle1" animation.
- IF idle2: tell the MeoPlayer to be playing the "idle2" animation.
- IF walk: tell the MeoPlayer to be playing the "walk" animation.
... ETC ...
- Remember which animation was last set so we don't keep setting it every frame.
Set the screen location for the MeoPlayer animation of the hero.
Run the current animation's calculations.
52) Next we'll need to draw the hero and all the spells. This Draw assumes quadBatch.Begin was setup before calling it here:
- //--------
- // D R A W
- public void Draw()
- {
- // DRAW CHARACTER
- quadBatch.Begin(meo.tex, BlendState.AlphaBlend);
- Color hero_color = Color.White;
- if (invincible > 0)
- {
- int n = invincible % 10;
- if (n > 5) hero_color = new Color(255, 155, 155, 255); // flashing if invincible
- }
- meo_hero.Draw(hero_color);
- // SHOW SPELLS:
- quadBatch.End(); quadBatch.Begin(tex, BlendState.Additive, SamplerState.LinearClamp, DepthStencilState.None);
- int i = 0;
- while (i < spells.Count)
- {
- spells[i].Draw(Vector2.Zero, quadBatch);
- i++;
- }
quadBatch.End(); - }
- }
- IF the invincible counter > 0 then:
- - set the character to flash more of a red color periodically (using MOD or % ... so numbers move between 0-10 repeatedly during countdown)
- use MeoPlayer to draw the character
- switch to additive blending so effects add colors together to brighten as they layer:
- draw all the fireball spells (using quadBatch version) [particle fx]
>>> NEXT PAGE(4) <<<